Sunday, April 29, 2012

Internally Wiring the Bars Pt.1-Six the Hard Way

Ok so now that the holes are drilled out I thought to myself, "Oh man I got this now!"....How wrong I was.  I mean I knew it was going to be tricky, but little did I know I would end up cursing like a sailor, needing to solder some connectors and learning some very critical information the hard way.

So first I took some thread and tied a nut to the end of the string to put the nut in one one and jiggle it out the other, however, turns out that the nut was too big and I instead decided to use a small screw


Once I dropped the thread with a nut from one hole to the other, then I tied the end of the string to a low E guitar string and pulled the guitar string through the  bars


That proved to be somewhat ok.  I also bought some rubber grommets to put around the holes I drilled that way I would not have to file them down, and they did indeed fit perfect


I pulled both strings through


Then I took the 6 wires from the hand controls, tied an overhand knot around them and taped up the whole thing with electrical tape so it would not come apart while viciously pull them through the bars


Here it is all bundled up


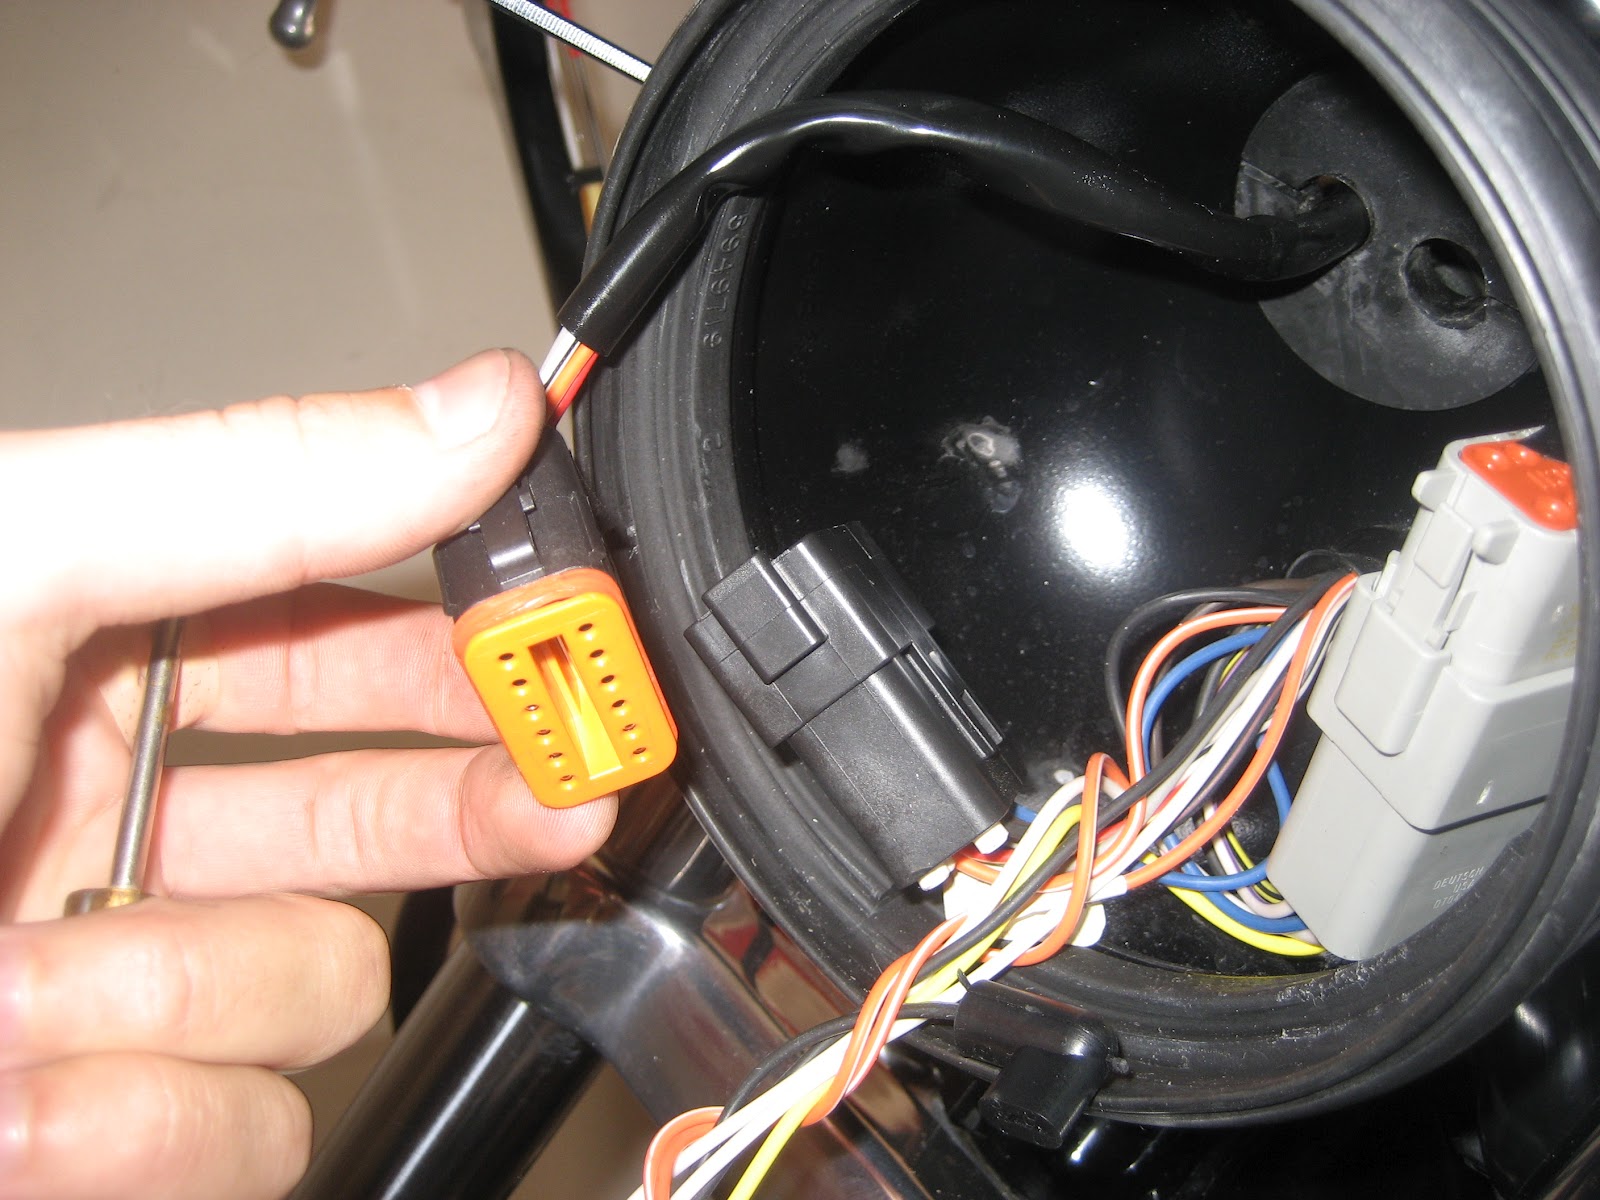
This is where things start to go a bit amiss.  So after trying multiple times to pull the bundle of 6 wires through the bars, I finally get them through (one of the times I realize that the black plastic sleeve bunched up at the 90 degree bend rendering the try useless and having to start all over again, only after cutting off most of the wrap).  However, when I do finally get them to the bottom hole, I realize that the bundle of connectors are too wide to fit through the hole.  I tried vigorously to try and get them out seeing as how I just victoriously pulled them through, but to no avail.  I was pulling out single connectors one at a time.  As you can see here, I got about the 3 of the wires out when tragedy struck...


I broke off one of the Deutsch connectors!  Not a happy moment.  It was about here that I was so pissed off that I stopped taking pictures.  At this point I dropped everything and rode over to Radio Shack where i had to pic up a solder kit (the old one I had was not heating up).  So then I came back and although the night was getting late, I was determined to fix my wrong.  I immediately heated up the solder gun and got to it.  Soon enough, the connector was back on.....oh wait, did I mention that because i could not get all the wires through that I had to pull them all BACK OUT!!!!!!  Well, I did and I was not happy about it.  So anyhow, after I got the connector back on I had a great idea: Instead of pulling out all 6 wires at once, I would break it up and do 3 and 3.  More time consuming but it might work.

And in fact it did!  I had to first put the wires through the grommet so it would be on the back end.  But none the less, I got all the wires through!!!


Here they are all out!


Then I took the extra black sleeve that I cut off and slid it back over the wires and up into the bars.  Slip the wires through a grommet on the bottom, placed grommet around the hole and there it is!  One side of the bars internally wired and some good lessons learned.  Ones that would help make the other side a bit of a breeze...although I had the throttle to deal with.  Either way!  I was stoked, I had some success, and promptly tapped out for the evening.

Sunday, April 22, 2012

Drillin' Out the Holes

Well, first I got out my drill and drill bits and figured I would start out by drilling some small holes and then bore them out to 1/2" holes.  Seemed to make more sense then just trying to bore a 1/2" hole straight from the get go.  Decided to do a practice run on my old bars before getting down to business with my new Biltwell's, seemed easy enough.  I will say though that not having a work bench or vice or any sort seems to be making things a bit more complicated in terms of securing the bars for drilling, but I rigged up a nice little set up using a blanket, some old shocks (in boxes) and my good ole feet.  Though drilling on round bars made it a wee bit exciting because one slip O' the drill and I got a hole in my foot.


Here is the practice holes...good enough for rock'n'roll


I then mocked up how I wanted to have the bars sit and yes those are my safety goggles for drilling.  I learned REAL quick that eye protection was very much a necessity when drilling metal.  Also here is what I did not show.  After I mocked them up I used tape on the bars to mark where I was going to need to drill so that when I internally wired the pods back on they would sit properly and in the right space.  Also then where the wires were going to have to exit out the bottom.  This was not a good time and was actually kinda stressful ergo there are no pics because while one is frustrated, taking pics is the last thing you wanna do.


Ok so here is after I taped, marked and drilled the first holes.  Looks good!  However, I noticed that the Biltwell bars are made from some REALLY strong steel and thus drilling holes was ALOT harder than on the other bars that I had....literary scholars would call this foreshadowing....


Wait just a minute, there are no pictures for this but it bears to be mentioned:  I HIT A BIT OF  SNAFU.  So as I am drilling I get to where I am boring out holes from size 5/16" to 3/8" and guess what!?!  I could not bore it out!!!!  It just would not work!!!  The drill seemed inadequate to drill any bigger of a hole.  The steel was just too strong and my drill and bit was not strong enough.  So off to Home Depot I go.  I upgrade my drill to a major hammer drill and buy some Cobalt drill bits to drill through heavy duty metal.  I then get back home and start drilling again with my new Milwaukee heavy duty drill and bits....3/8" hole, no problem but when I them try and bore out to 1/2"....I SNAP THE DRILL BIT!!!!!!  That is how hard this metal is, I snapped a cobalt heavy duty Milwaukee drill bit!  So back to Home Depot I go....a bit annoyed thus no pics.  I buy a couple new drill bits and return home determined to finish boring out these holes before it gets too late in the day and the neighbors begin to hate me.

Here I am drilling with my new drill and bits


Ah, success!!!!!


And to check the holes, here it was mocked up on the bike again


And it was here I called it a night!


Front End Electrical

So first things first, I had to disconnect all the front end electronics going to the control pods on the handlebars.  They are routed eternally and then they go into the headlight bucket and connect to the deutcsh connectors there.  So I opened up the headlight and disconnected the wires there first.  Then I pulled them out of the bucket and disconnected them from the bars.  The clutch side was easy, but removing the throttle side is a bit trickier because in preparation for the new bars I have to remove the throttle as well...


See the throttle housing and the control pod are one and the same so removing the pod means removing the throttle so I opened it up


Removed the cables (was sure not to lose the brass ferrule on each one)


And off comes the throttle sleeve.  As you can see I had to use the headstock of my bass as a make shift holder for the master cylinder/front brake


Taped off what was what so I would remember


Then I removed the bars and we are ready to begin drilling out the holes on the bars to ready them for internally wiring.


Thursday, April 19, 2012

New Bars Came!!!!

Well as I was working in the ye ole garage, Mr UPS man came with a sweet bundle of excitement!!!  My bars and grips finally came!  Big thanks to Lowbrow for the order.....AND they included some awesome extra stuff like stickers and a keychain (which became absconded by Christa Jayne immediately (with I was stoked for her to have)).

Now I just have to drill those holes to internally wire this bad mofe.  I am also waiting on my speedo housing to really clean things up but who knows when that bad boy will arrive.  But as it is I am stoked on my new ish!


Wednesday, April 18, 2012

Getting ready for Workin'

I have been tracking my new bars and stuff and it looks like it is coming tomorrow so in preparation of the new bars I did some work to get the front end ready.  Plus I like to go through stuff once before hand (take it apart and put it back together again) that way I know how it all works and no surprises.  Also it allows me to figure stuff out before so when I am actually doing the work, I don't get stuck...which I can't stand.


Go those bars coming and the single speedo housing from a fellow CC member.  Thinking about starting a build thread on CC as well or at least writing a How-To about removing signals.

Tuesday, April 17, 2012

Took Off the Signals

So now that I have my manual I decided to clean things up a bit.  I wanted to keep my hand controls because if (and when) Johnny Law pulls me over for not havin signals, I just want to go home, hook up the old ones, drive over to the CHP and get them to sign off on the fix it ticket and pay my $25, and take them off again.  So I decided to unhook the signals wires from the Deutsch connectors.

Bought this stuff from the hardware store


Took off the seat to get to the wires and connectors


Unscrewed the rear signal from the back fender


Located the Deutcsh connector or the rear signals (found it from my manual)


Unplugged wires had to open connector and then released the pin


Routed out the wires and out comes the signal all in one piece


 Did the same for the right side one


Now on to the front, unscrewed the signal from the handlebar controls

Opened up the head light bucket and found the front connectors


Located where the wires connected via das manual


Opened it up and disconnected by releasing the pins


Routed it out from behind the headlight and off it came!


Oh yes!  I now had open holes that needed to be covered so I covered them with a small piece of electrical tape so's not to compromise the integrity of the connector.


And there they all are


Put the head light back together


And BOOM, no more ugly signals hanging down from the bars


or from the rear (it looks dirty cause there is a coat of wax on there) and I put the chrome bolts in


That's what I did today...got some stuff on order should come later this week...handlebars, grips, and a new speedo housing.  Weather is getting hotter and I wanna get this stuff done.  Also thinking about custom painting my helmet.....it's not so hard (famous last words).