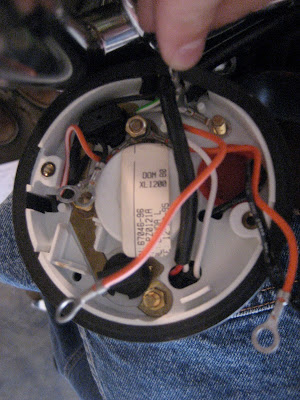
Here is the speedo open:
Here is a wider angle
You can see the loose wires that needed to be disconnected. The black thing in the middle is the trip meter. On the right of the photo you can see that there are 2 wire bundles that run out of the speedo. One bundle goes to the deutsch connector and the other goes to the main wiring harness under the seat.
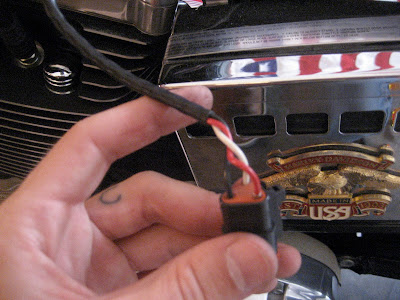
There is where that bad boy connects
Undo the connector and you can see the 3 pins that need to be removed in order to free the speedo
Once disconnected I noticed that the wire is zip tied to the main bundle of wires that run from the main wiring harness forward, under the tank. I followed the wire bundle down from the speedo housing and came to the conclusion that I might have to take off the tank in order to free the wire bundle. But then I realized that if I clipped certain zip ties, I would have enough slack to pull the wire free. Then I would just use new zip ties when I ran the wire bundle back to the main harness.
If you are wondering why I had to do this its because the wire bundle runs into the speedo and THROUGH the speedo/tach bracket. So even when you push the speedo out of the housing, this wire bundle still runs THROUGH the bracket, you cannot disconnect it at the speedo because it runs into the speedo, you have to disconnect it that the main wiring harness.
You can see here where I cut the zip ties

This is the path of the wire bundle
About the ignition coil is where I pulled the wire bundle after I freed it from certain zip ties. It took a bit of convincing but it started to come out
Then next thing I knew, the wire bundle was free and so was the speedo and bracket. You can see that at this point the instrument lights are still attached to the mounting bracket
From here it was a breeze. I just unscrewed the lights from the back of the bracket
Oh yes, you can see on the left there is where I taped up that loose ground wire.
I screwed the dummy lights into the new single speedo housing and then....
It took a little convincing but I pushed the new speedo in the housing and re attached the loose wires in the back. Here is a little tip: Use some WD-40 on the foam rings that go around the speedo to help get them in between the speedo and the housing. It will take a little work, but the WD-40 will help (also might have been because the housing was slightly out of shape (but only slightly)).
Next thing you know.....here it is the single speedo ready to go.
But then a funny thing happened....


No comments:
Post a Comment